18 Beautiful Maternity Photoshoot Poses for Expecting Moms
See a full list of maternity photoshoot poses for expecting moms! Find flattering maternity pose and photoshoot ideas for a stunning maternity photo session.
Maternity posing is about shape, comfort, and subtle direction. Small adjustments in hand placement, shoulder angle, and breathing can turn a standard pose into a flattering, natural portrait that highlights the baby bump and the mother’s posture without feeling staged. These poses are built to work in studio, outdoors, and at home, and they adapt easily to every body type and clothing style.
Each pose here is chosen because it photographs well from multiple angles, supports the body comfortably, and encourages genuine expression. I’ll talk through the exact direction I give, how I adjust hands and shoulders, how I coax movement from fabrics, and the way small adjustments in angle to the camera and focus planes can turn a good image into a great maternity portrait.
When you’re ready to go deeper, the ROXAMINA Photography Academy Courses are a great next step for both parents and photographers looking to learn more about the art or maternity and newborn photography.


Preparing For A Beautiful Maternity Session
The magic starts long before the first click. I always begin with a short pre-session chat where we talk about how she’s feeling today, an expectant mother might need extra breaks or a softer stool. If mobility is limited, plan poses that can be done sitting or standing with support. Even in couture gowns, comfort is non-negotiable. Keep the studio warm enough that a bare belly never goosebumps, have a robe within arm’s reach, and offer a mirror at waist height so she doesn’t constantly crane her neck down.
Next comes wardrobe and texture. Use fabrics that drape and move, not cling and wrinkle, tones must complement her skin, and pieces should allow the baby bump to read as the star. If the dress is fitted, Check the seam lines around the ribcage and hips to ensure they don’t create compression where you don’t want it. For flowing gowns, plan where you'll catch the fabric mid-air. If she prefers a more minimal look, suggest a bandeau and silk skirt so we can sculpt with light. For outdoor maternity sessions, bring clips to adjust length on the fly so she can walk safely and the train doesn’t swallow the composition.
Finally, warm up with micro-directions that anyone can do, for example telling them to roll the shoulders back and down, lengthen the neck by imagining a little thread at the crown of the head, and bring the tongue to the roof of the mouth for a relaxed jaw. The first frames are just movement and breath so she forgets there’s a camera and remembers she’s beautiful.


Confidence for Maternity Photoshoot Poses that Flatter
Most people don’t know what to do with their hands, and in a maternity session, hands are everything. They communicate tenderness, protection, and anticipation. I avoid the two hands flat on the belly like a plate look and instead direct to hold fingertips together, wrists relaxed, thumbs floating. One hand cradles beneath the bump, the other draws an elegant line above the navel, or rests at the waist to carve shape. If a partner is present, we choreograph hands so they never compete, one set is always framing the pregnant belly, the other supporting the waist or offering a gentle touch at the shoulder.
When the camera rises to the eye, I narrate what I’m seeing. I praise what’s working. I give small adjustments instead of big ones, chin slightly forward and down, angle to the camera a touch more, soften the bottom lip...
For lighting during golden hour outside or soft window light inside, I angle the body three-quarters to the light and let shadows sculpt the curve of the bump. When I mix natural and studio light, I balance so that skin looks luminous, never shiny.
This is where my Natural & Mixed Light Course and my Signature Maternity Style Lighting Course can save years of trial and error.


Pose 1: The Classic Silhouette With Golden Hour Glow
Position the expectant mother with the setting sun behind her and create a clean side profile. Place the baby bump closest to the camera and lift the chest slightly to form a gentle S-curve from collarbone to belly. Shift weight onto the back foot and add a soft bend in the front knee to avoid stiffness. One hand supports underneath the bump, and the other rests at the lower back to lengthen the torso.
A subtle forward reach from the ears before turning back to profile prevents compression in the neck and defines the jawline. Keep the horizon line clean behind the body, and if using sun flare, angle the sun so it sits just behind the head or bump for a soft glow.
Pose 2: The Soft Stomach Hold With Downward Gaze
Turn the body about thirty degrees toward the camera and lower the gaze toward the bump. Keep shoulders relaxed and hands feather-light—fingertips trace along the curve rather than pressing. Hands photograph best when the wrists stay soft and fingers gently grouped, never splayed. If the belly button or skin texture needs subtle flattering, place the hands in positions that smooth without hiding the bump.
For close-up versions, use shallow depth of field and let the eyelashes and hands hold the sharpest focus while the rest softens naturally.


Pose 3: The Seated Goddess On A Low Stool Or Floor
Use a low stool or seated position where the knees sit slightly below the hips to maintain good posture and prevent collapse. Cue a tall spine and lifted sternum, and angle the body slightly to the camera while bringing one knee forward to create shape. A bare belly, bandeau with draped fabric, or fitted knit dress all photograph well here because they emphasize the natural curve of the bump.
Add soft fabric, such as chiffon or silk, and allow it to fall or move gently to introduce a sense of flow. Extending one leg or tucking one foot beneath can help lengthen the overall line of the body.
Pose 4: The Exhale & Lean
Lean the body gently against a wall, headboard, or supportive surface while maintaining the curvature of the bump. A slow exhale softens the mouth and shoulders. Keep a slight forward reach from the ears to prevent compression under the chin. Stagger the feet so that one stands slightly ahead of the other, creating natural counterbalance. A hand at the hairline, collarbone, or belly adds shape and keeps the lines relaxed. If wearing a fitted dress, smooth the side seams beforehand to ensure clean, flattering contours.


1. The Silhouette Shot: Sculpting Light and Shadow
Few maternity photos are as striking as a perfectly sculpted silhouette. The beauty of this photo idea lies in its simplicity, no distractions, no background details, just a pure outline of a woman’s strength and grace. Silhouette maternity photos invite the viewer to slow down and look at the form, at the rhythm of the curve, at the quiet statement of the baby bump. This kind of image turns shape into poetry.
The secret is light placement. To create a dramatic silhouette maternity photo, place a strong, controlled light source behind your subject, aimed toward the backdrop rather than her body. A large softbox or an evenly lit white backdrop gives the cleanest contour. When she steps between the light and your lens, her figure falls naturally into shadow, while the background glows. This creates that crisp, glowing edge known as rim lighting. You can also experiment with colored gels behind the subject for creative maternity photoshoot ideas, warm amber for softness, pale blue for serenity, or deep magenta for an artistic edge.
The trick is to emphasize the baby bump without forcing posture. Have her turn slightly to the side, about 45 degrees from camera, so her belly defines itself clearly against the light. Ask for a soft bend in one knee, which naturally creates a gentle “S” curve through the body. Shoulders back, chin tilted slightly down, fingers lightly grazing the bump. Each small adjustment changes the emotional feel of the image. For a more statuesque result, let her raise one arm gracefully toward her hair or neckline, for a softer tone, have her cradle her belly with both hands.
To see how to shape rim light for different body types and fabrics, I teach my exact setup inside the Maternity Lighting Scene 6 Course.

Pose 5: The Walk
Use movement to release tension. Ask for slow, small steps and a natural stride. If the dress is long, gather it slightly at the hip to reveal leg movement and maintain control. For emotional authenticity, keep conversation light and engaging so expression stays relaxed rather than posed.
When a partner is present, join hands at hip height and allow natural glances and interactions to occur. Pay attention to wind direction, turn the body so fabric lifts behind rather than across the front. If no wind is present, a small fan or fabric toss creates the same sense of motion.
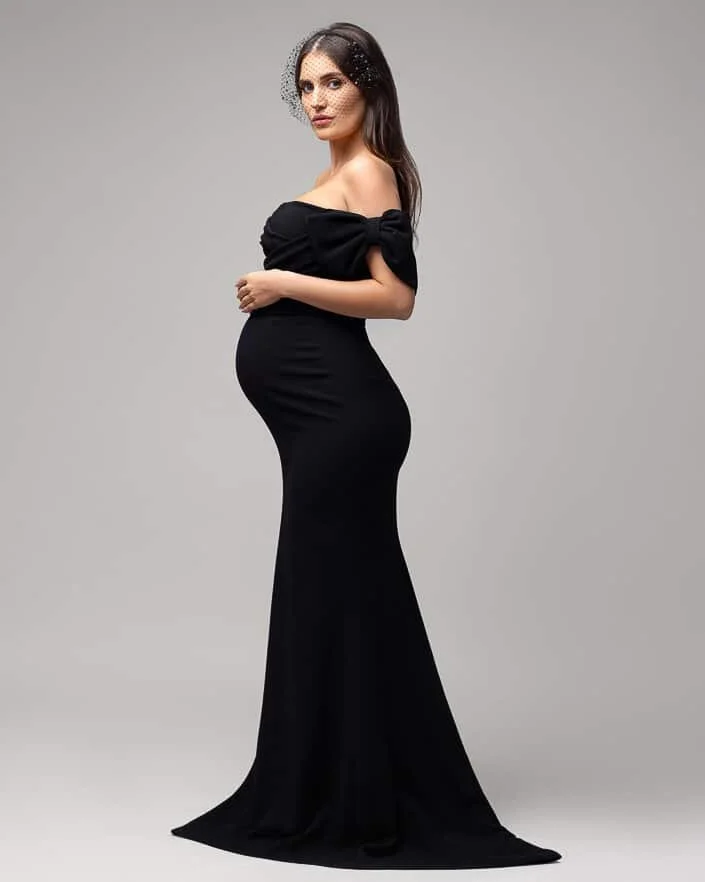
Pose 6: The Over-The-Shoulder Look Back
Turn the body three-quarters away from the camera, then guide a slow turn of the head back over the shoulder. The chin reaches forward slightly to keep the neckline long and defined. Eyes can meet the lens or drift softly past it for a more candid tone. If the hair is long, sweep it to the far shoulder to reveal the neck and allow the bump’s contour to read clearly through the dress.
A torso angle of around thirty to forty degrees maintains the roundness of the baby bump while still showing shape and curve. One hand resting at the lower back and one tracing the top of the belly creates elegant balance and a confident, feminine silhouette.


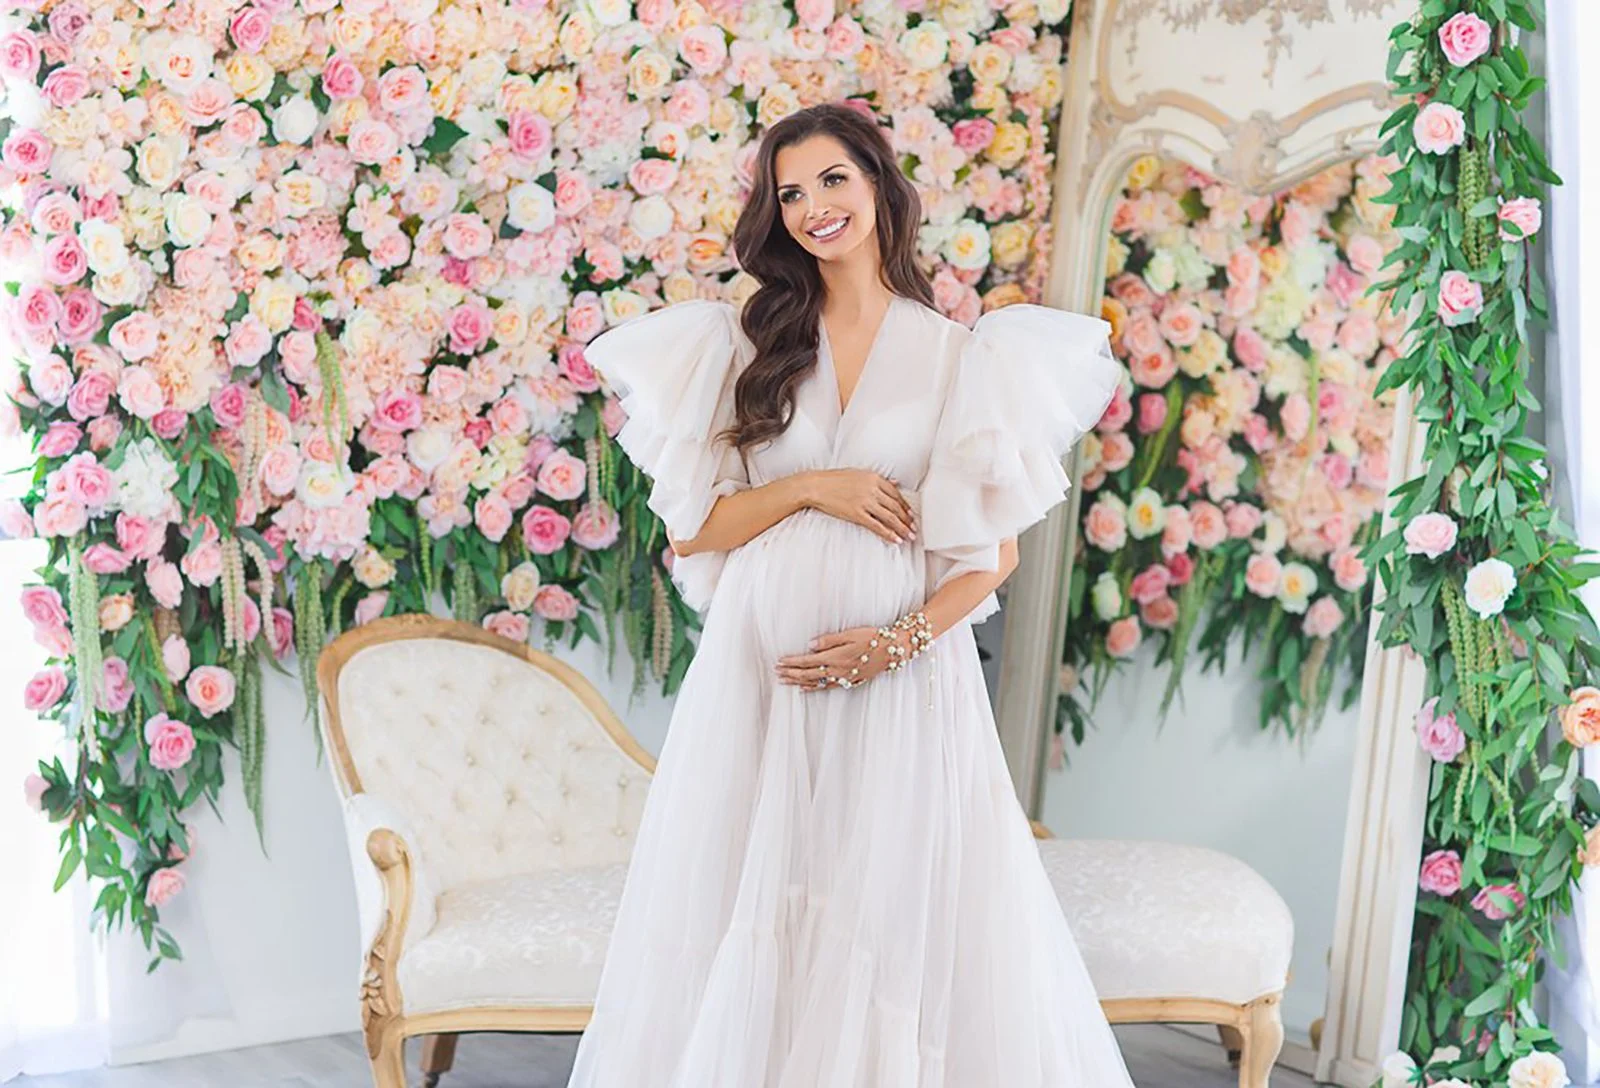
Pose 7: Standing Straight & Strong
Stand with feet grounded and hips subtly angled so the belly is closest to the camera. Lift through the ribs, relax the shoulders, and maintain a serene, intentional expression. Hands frame the bump with sculptural lightness, one below and one above, or one at the waist to define an hourglass line. For gowns with long trains or dramatic silhouettes, shape the fabric so it forms visual pathways that lead back to the face and belly. A low, gentle fan can add movement without overwhelming the frame. This pose becomes a portrait that feels elegant and iconic.
Pose 8: The Lying-Down Luxe Pose
Recline with gentle support behind the shoulders so the neck remains elongated and relaxed. If lying on the back, bend the knees and tilt them slightly to one side to ensure the belly is comfortable and prominently visible. If lying on the side, place a pillow beneath the bump and one between the knees to maintain alignment and prevent strain.
Fabric can drape naturally or be softly gathered to create shape. One hand supports the head, elbow slightly forward to keep the arm narrow, while the other hand rests near the belly with relaxed fingers. Soft window light or a diffused studio source enhances the serenity of this pose, drawing attention to eyelashes, hands, and the quiet curve of pregnancy.


Pose 9: The Wrapped Belly Pose With Stretchy Fabric
Use a soft, stretchy wrap and secure it under the bust and around the belly so the shape remains clear and smooth. Angle the body slightly toward the camera and guide the belly forward for definition. Hands rest lightly, fingertips together, never pressing so the lines remain gentle.
Adding a sheer, trailing layer introduces movement and dimension, especially when lifted softly on a count. Photograph slightly below eye level to elongate the lines of the body and keep the wrap looking sculptural rather than tight. This pose creates a fine-art feel while maintaining modesty and comfort.


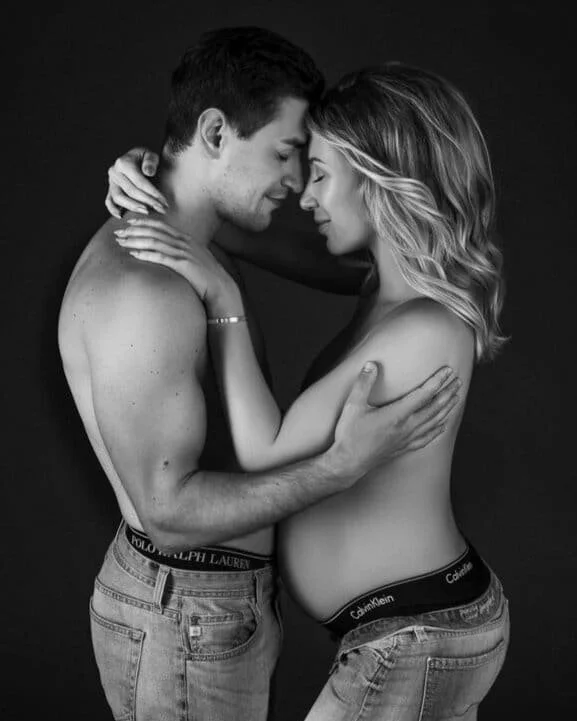
Pose 10: The Bare Belly Close-Up
Focus on the curve and the connection. Moisturize the skin for a soft, even glow that reflects light without shine. One hand supports from below with relaxed fingers, while the other traces the upper curve with the thumb tucked. If including a partner, stagger hand placement so each touch has its own space and rhythm.
Crop from the bust down or at the waist so the frame feels intimate and storytelling. Shallow depth of field keeps the belly in crisp focus while the rest of the frame melts softly around it.
Pose 11: The Milk Bath Pose
Prepare a warm bath with a one-to-three ratio of milk to water for a cloudlike softness. Use petals and blooms without pollen and trim stems short for tidiness. Support the back with a rolled towel so the posture stays relaxed and the bump rises gently above the waterline. Hands float near the belly with unforced wrists and fingers. Knees bend softly, and toes can peek for a delicate line.
Place flowers around the bump rather than directly on it so the shape remains the focal point. Photograph from above, watching the rim of the tub for clean composition and avoiding distortion. The result is feminine, dreamy, and serene.
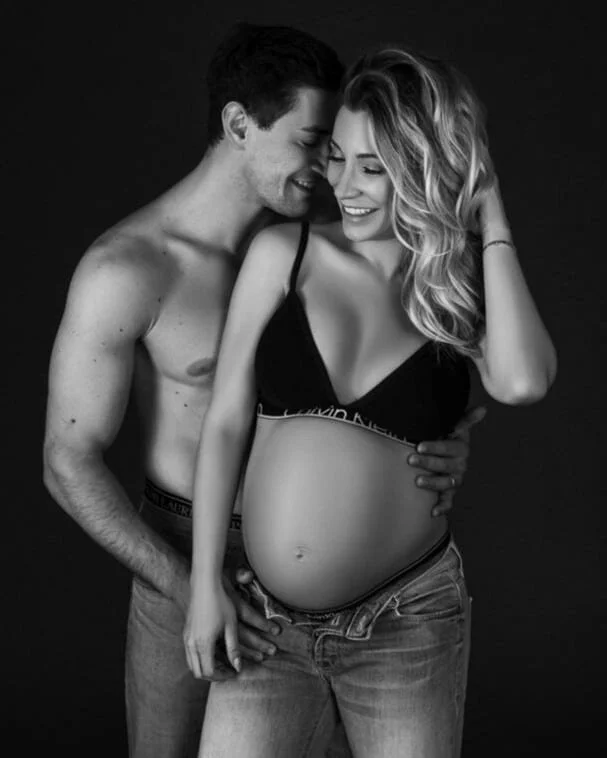
Pose 12: The Partner Standing Behind, Hands Around Belly
The partner stands close behind, chest aligned to back, arms wrapping low around the belly in a protective, supportive hold. A shared inhale, followed by a slow exhale, softens shoulders and brings tenderness into the pose. The partner’s cheek can rest gently near the temple, or both can close their eyes for a moment that feels peaceful and connected. Hands stay relaxed and curved rather than flat or pressing.
Balancing height is key. If there is a tall partner, a slightly wider stance or a subtle elevation for the expectant mother allows faces to align naturally. Fingers remain soft across the belly so the touch reads loving rather than posed. This pose works standing or seated; on a bed or loveseat, bodies nestle together more closely and the mood deepens.
For a deep dive into couple posing flow see my Posing Couples In Maternity Shoots Course.
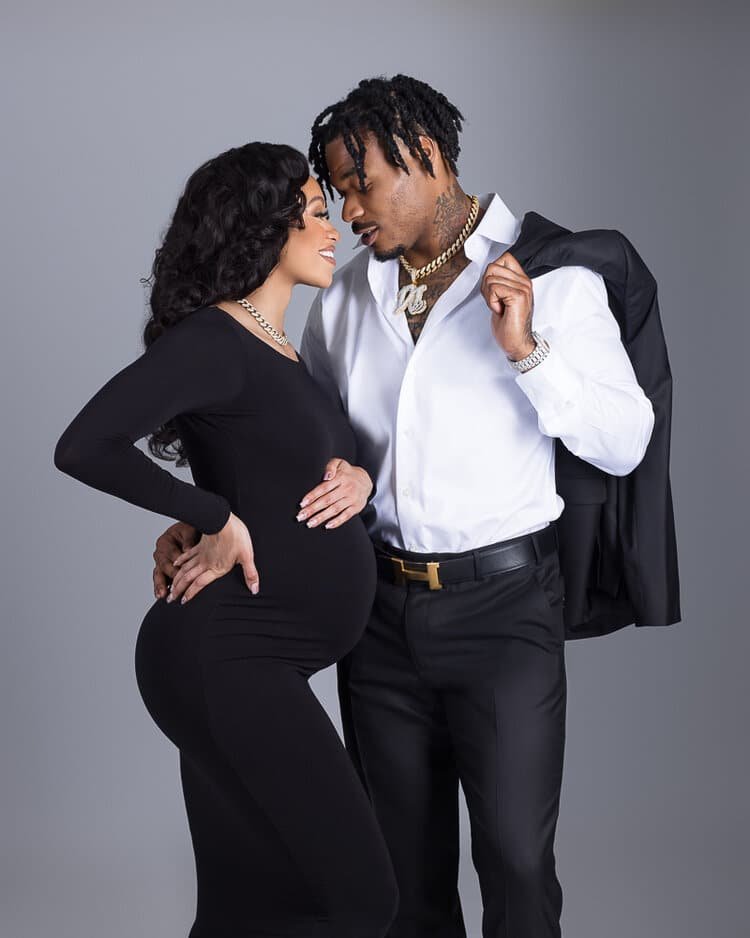
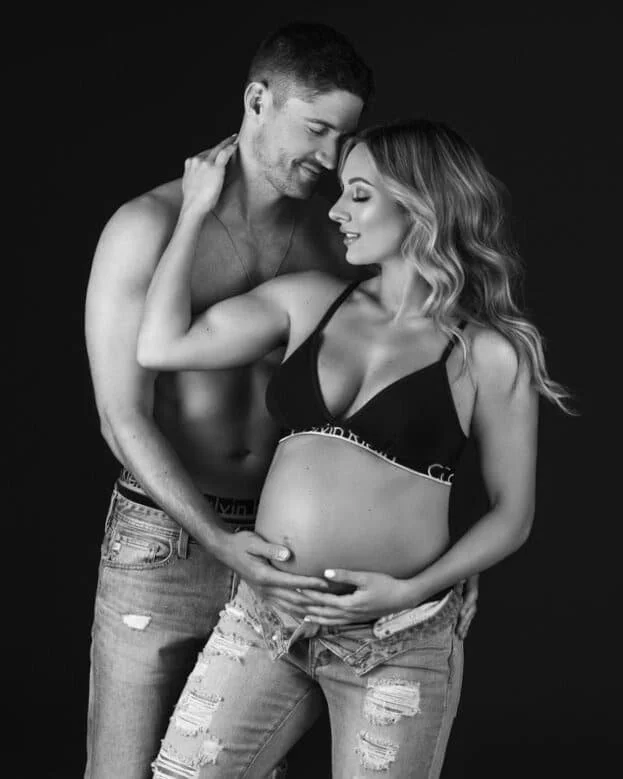
Pose 13: The Couple Sitting Close, Foreheads Together
Both sit with knees angled inward and hips gently touching so no empty space forms between the bodies. Hands rest instinctively, her hands on the bump, the partner’s around her waist or clasped lightly with hers. Foreheads come together, and the breath slows. A tiny smile or closed eyes can shift the photograph from posed to deeply felt.
To keep the baby bump front and center, position it closest to the camera. When seated on the floor, angle both bodies slightly so the curve of the bump forms the visual apex of a soft triangle. This creates a quiet, emotional frame.


Pose 14: The Draped Fabric Or Veil Motion Pose
Fabric introduces movement and emotion. The expectant mother stands at a slight angle, belly closest to the lens. A long silk veil or lightweight textile lifts and falls gracefully as she exhales. The motion should feel slow and organic rather than energetic or dramatic.
Guide the fabric to arc around the body in a soft frame that highlights the belly and face. If someone assists with a gentle toss just out of frame, time the shutter for the float before the fabric settles. The result is ethereal and serene, an image that feels like standing inside a breeze.
Pose 15: The Gentle Kiss On The Baby Bump
This maternity photo pose lives in subtlety. When the partner kisses the belly, the touch should be slow and lasting, not a quick peck. Closed eyes communicate sincerity. If an older child participates, guide them to a different spot so faces and hands have their own space and no one overlaps awkwardly.
The partner’s posture matters. Rather than folding forward, the spine stays long. One knee may lower while one foot plants forward, bringing the body toward the belly with intention and grace. If standing, a soft wrap-around from behind, followed by a shoulder kiss and hands resting at the bump, creates an intimate moment filled with tenderness and excitement.
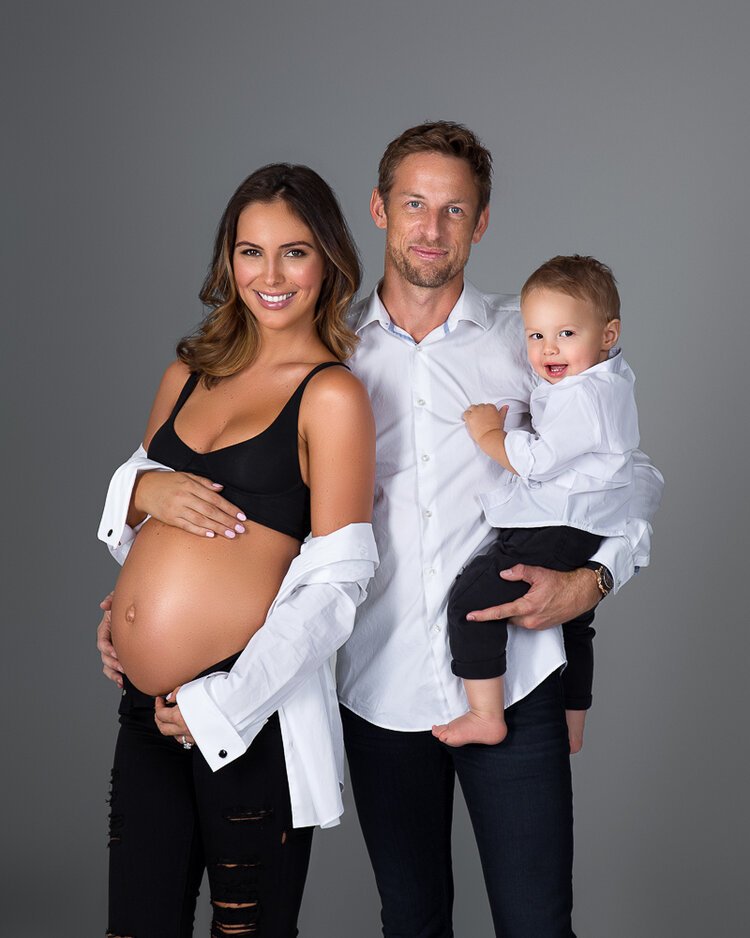
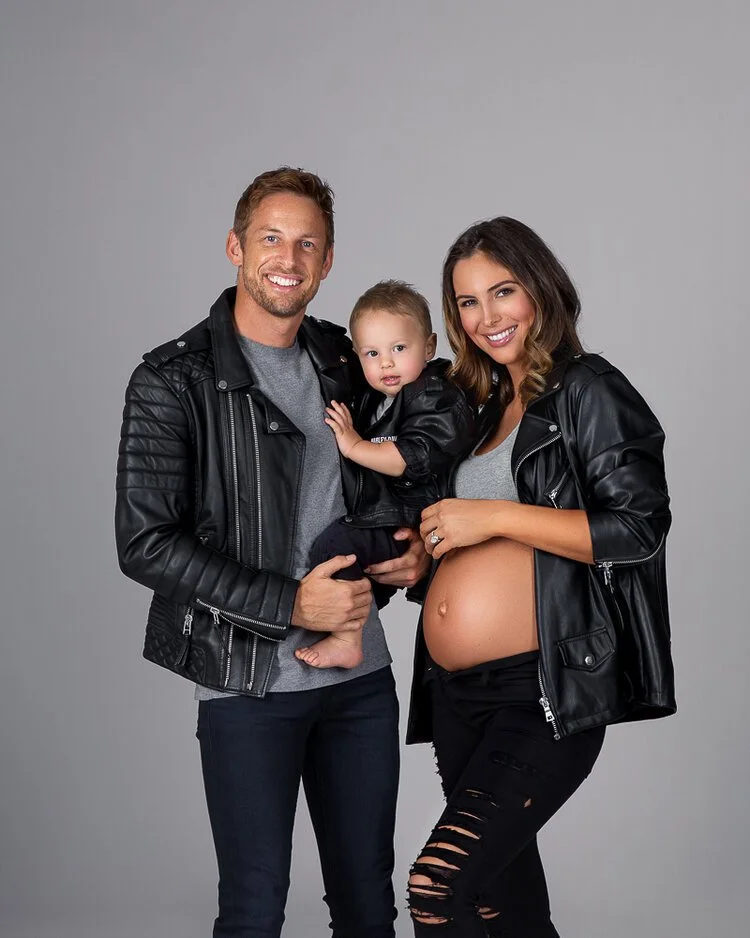
Pose 165: The Family Maternity Pose With Older Child
In family poses, the pregnant mother becomes the visual anchor. Position her centered, either seated or standing, with the partner and child angled slightly inward toward the baby bump. The child receives a job suited to their age: resting hands on the belly, hugging both parents, or holding a tiny baby item.
Children photograph most beautifully when movement is allowed. Asking them to run into a cuddle, to compare hand sizes, or to count imaginary baby kicks turns the pose into play. The result is joy that feels natural and unforced, preserving the warmth of this fleeting chapter.
Pose 17: The Baby’s First Gift Pose
Props are accents, not focal points. Baby shoes sit in the hands near the bump rather than placed on top. A printed sonogram tilts slightly to avoid glare. Backgrounds stay simple so emotion leads.
For a cinematic feel, place the prop closest to the camera with shallow depth of field. Focus on the hands and allow faces to soften in the background. This creates imagery that feels symbolic and tender, full of anticipation without theatrics.
Pose 18: Comparing Bellies, The Sweet Sibling Or Partner Moment
This pose is particularly sweet with an older child. The expectant mother stands in soft light, turned slightly. The child stands beside her, lifting their shirt just enough to show a tiny tummy. Both face the camera or each other, sharing giggles and curiosity.
The tone remains warm and respectful, never exaggerated. When the partner joins, the gesture becomes more subtle and the photograph captures family closeness, humor, and love, all without losing elegance.


The Finishing Touches That Elevate A Maternity Session
Breath is the invisible stylist in pregnancy photos. I often guide breath in the frame, inhale to grow tall, exhale to soften the lips and eyes. If nerves creep in front of the camera, I name them and make space for them. When a woman feels seen and safe, her expressions become unguarded. That’s when the close-up sings and the simple pose becomes art. If words fail, I borrow a little humor, laughter softens the jaw, which softens the eyes, and suddenly everything sparkles again.
Maternity Photoshoot Wardrobe
Wardrobe can flatter or fight the pregnant belly. For a sleek, sculpted look, I love matte fabrics with a touch of stretch so they hug, not squeeze. For movement, chiffon and silk catch the light beautifully. Avoid heavy, shiny satins that reflect unevenly. If you’re doing a pregnancy photoshoot outside, bring weights or tiny magnets to keep slits and wraps behaving with the wind. Jewelry is delicate, anything too bold competes with the story. Shoes are hidden more often than not, so comfort wins.
The Subtle Posture Adjustments That Create Graceful Lines
I ask for three evergreen adjustments through every pose, shoulders down and away from ears, neck lengthened with a tiny forward reach, and weight shifted more to the back foot with the front knee softened. Hands stay alive and never pancake against the belly. If a double chin threatens, I adjust the camera height and tilt, then re-cue the chin-forward technique.
A micro-tilt of the head toward the higher shoulder is feminine and soft. These little details, repeated gently, create beautiful photos across the entire photo session.

Couple Maternity Photos
For partner dynamics, I remind partners their job is to support and frame the expectant mother, not to perform. When in doubt, a forehead kiss, partner holding hands or hands grounding the belly will never steer you wrong.
For photo shoot props, less is more. Sonograms, baby shoes, and a tiny knitted hat are lovely. A way to capture narrative is to let the object enter or exit the frame, half-seen, the way memories work.
For location, golden hour is nature’s softbox for photoshoot ideas, but it’s not the only time to shoot. Early morning has a hush that suits intimate frames. Midday can work if you find open shade or backlight and expose carefully. Indoors, a north-facing window is a friend.
If you’re intrigued by mixing natural light with strobes for editorial depth while keeping skin tones honest, my Natural & Mixed Light Course and my Signature Maternity Style Lighting Course will give you the confidence to try different setups and still keep everything soft and flattering.
Working With Children And Pets
Children are honest. They won’t pretend to love posing, so let them participate on their terms. Give a job, holding the sonogram, forming a heart around mom’s belly, bringing a flower. If the child wants to move, build it into the photo, have parents hold the child in their arms for a few frames, then set them down and ask them to run towards the group for a cuddle. Pets? Keep them on a short lead just out of frame until the precise moment. Treats in the photographer’s pocket go a long way. The best family maternity images come from flexibility, not control.
See my full Family Photography Course here.


Conclusion
Every maternity session is a small miracle. These 18 maternity photoshoot poses aren’t boxes to check, they’re doorways into feeling. They help an expectant mother feel powerful and soft, celebrated and at ease, seen in a way that lasts. Whether you’re photographing a first baby or adding to a growing family, there is always a new way to celebrate, a new way to show the baby bump with tenderness, a new way to capture the essence of pregnancy.
If you want to go deeper, into light that sculpts without harshness, into couple maternity direction that feels intimate, into family choreography that keeps everyone happy, ROXAMINA Photography Academy was built for this.
My Maternity Photography Lighting Course Bundle pulls back the curtain on studio and natural light. The Natural & Mixed Light Course helps you master glow in any room or park. My Signature Maternity Style Lighting Course shows exactly how to get that soft, editorial finish.
And if you’re a do-it-yourself creative, the DIY Maternity Photoshoot Course and DIY Maternity & Newborn Photography Course Bundle make it possible to create beautiful photos at home.


About Oxana Alex
Oxana Alex is a Los Angeles–based fine art and maternity photographer known for her signature couture studio style. Over the past decade, she has photographed more than 3,000 maternity sessions, creating timeless portraits that celebrate strength, beauty, and the magic of motherhood. Her work has been featured in Elle, Harper’s Bazaar, and L’Officiel.
Through Roxamina Photography Academy, Oxana teaches parents and photographers around the world how to master lighting, posing, and creative direction in maternity photography.


Source: Oxana Alex Photography